To understand the background that led up to this ambitious project one needs to read through this old thread
I am calling this thread Taragoto "remanufactured" instead of Tarogoto restored for reasons that will become obvious as one views the pictures.
Part 1 of the challenge has been to carefully clean and disassemble the instrument, access the condition of its parts, and to devise a plan of action.
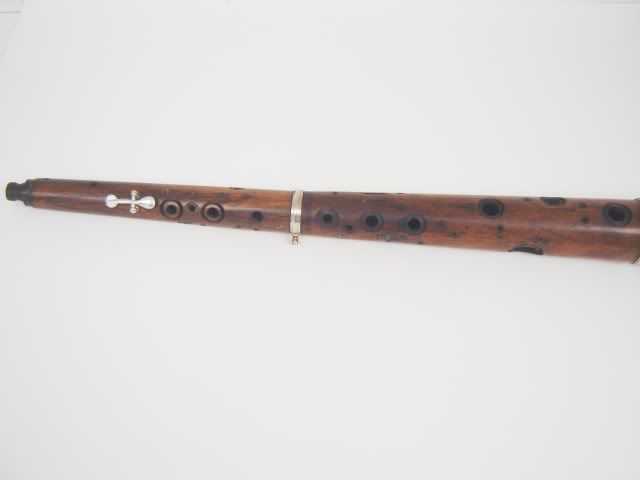
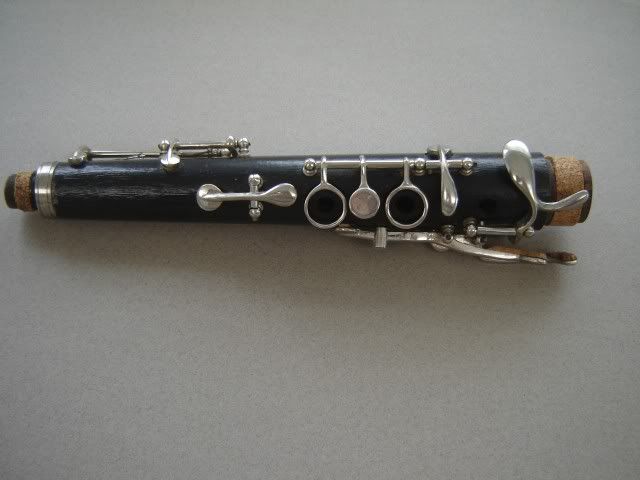
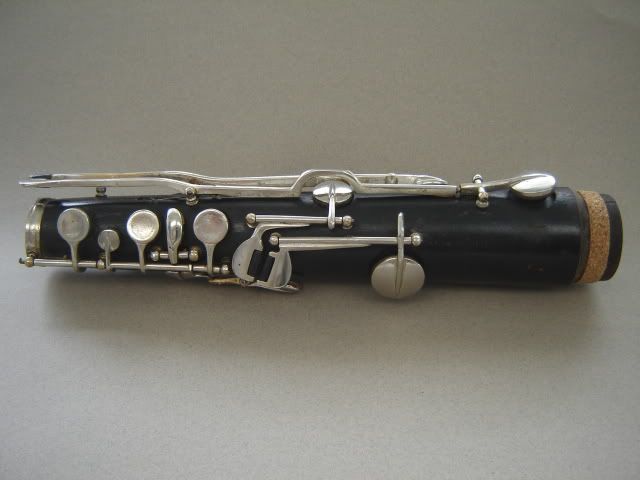
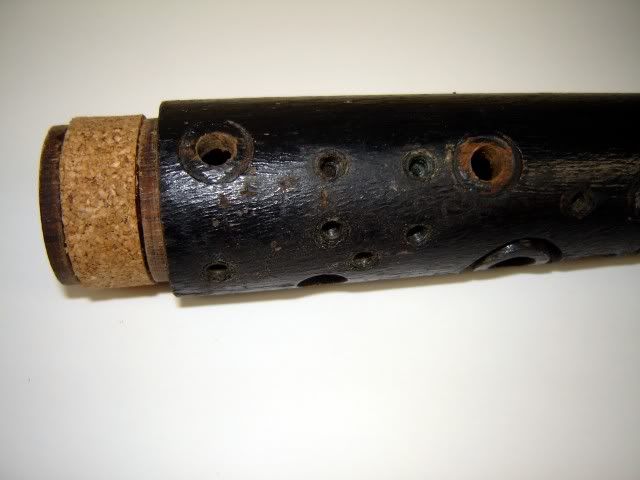
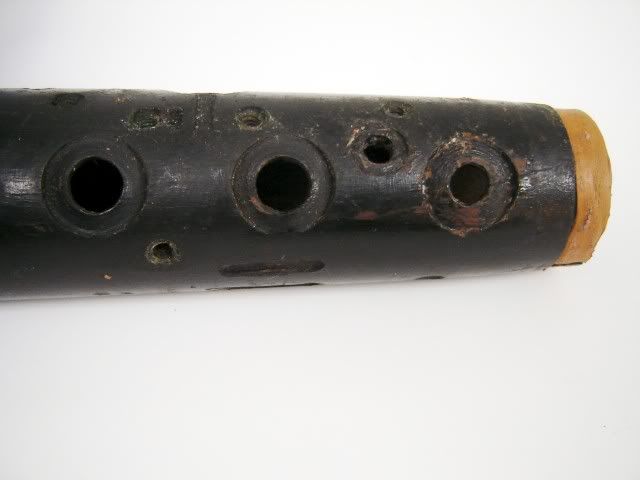
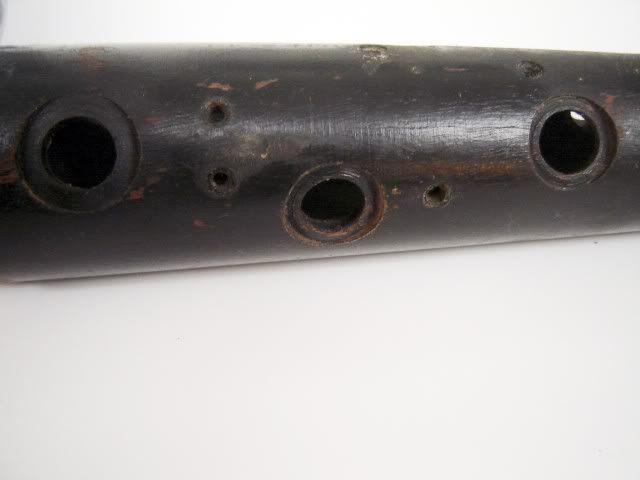
The first few photos show the original condition of the tarogoto at the time I received it from Toby (kymarto). " . . .to call it crude is an understatement" were his exact words when he posted about it. I know now he was being overly kind and generous in his remarks.")
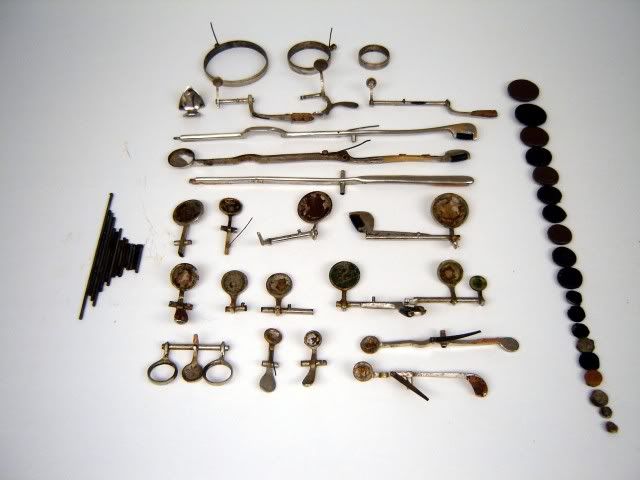
The next group of photos show the tarogoto disassembled, and the parts that were removed. The unthreaded rods holding the keys were easily punched out using a small nail set and a pair of pliers. It was mostly rust holding them in place anyways.
The posts came out quite easily as well. They are screwed into place and the shrinkage of the wood as it dried in Utah's climate made them easy to turn. The Music Medic small post pliers was the ideal tool to unscrew them.
It is interesting to note that few of the keys are actually "keycups" as we know them. They are simply dish shaped circles that the pad sits on, rather than in. On some keys there are needle springs beneath the key made to act as flat springs do on modern woodwinds.
The pads are handmade, thin, and made of various materials---none of which are familiar to me. They were glued to the key "dishes" with a glue that released when heated, thank goodness.
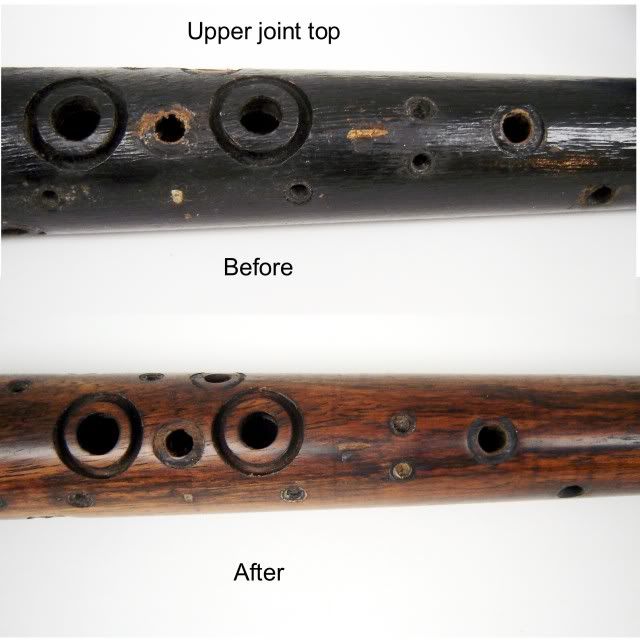
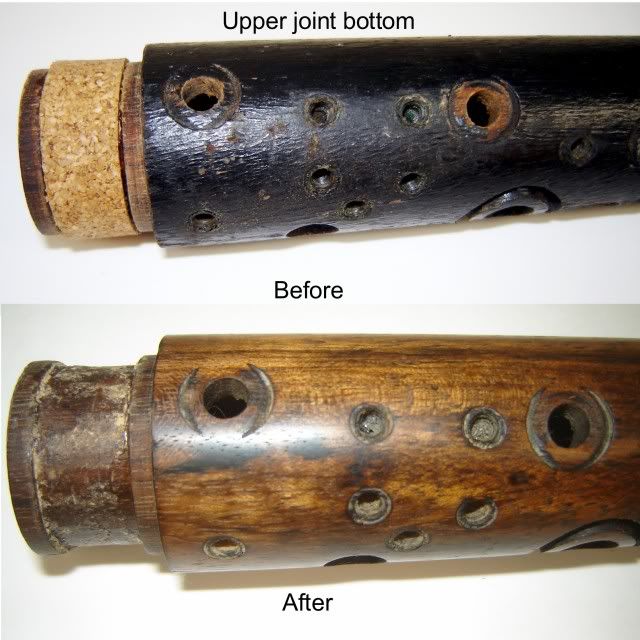
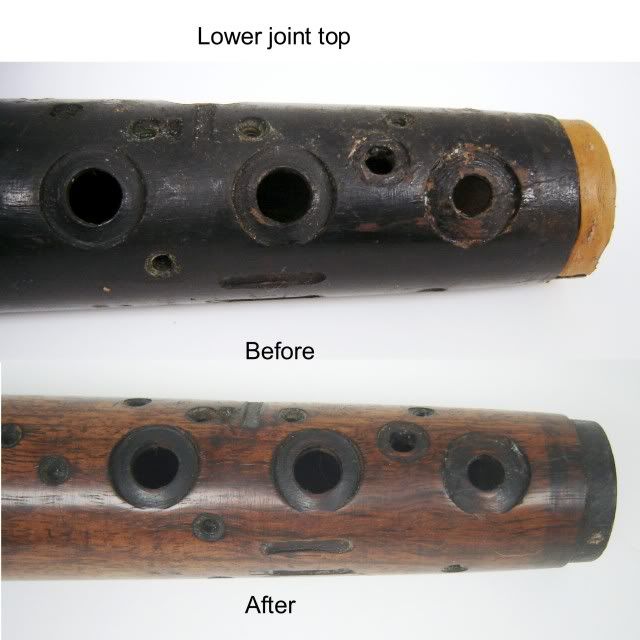
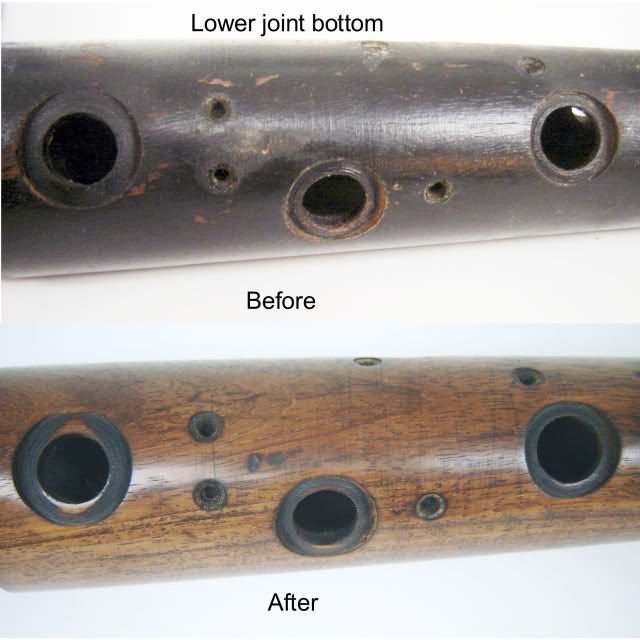
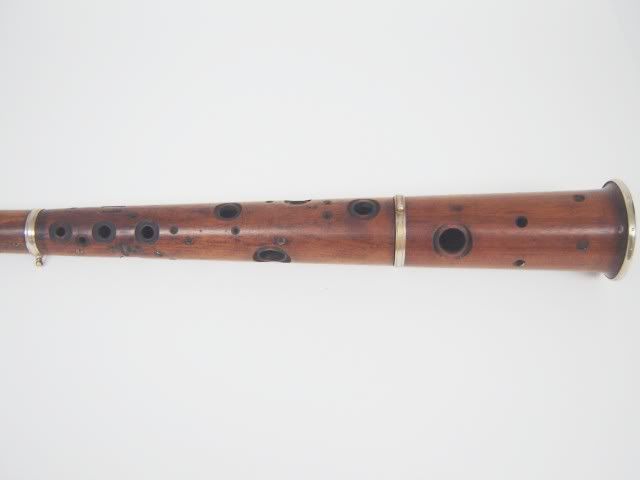
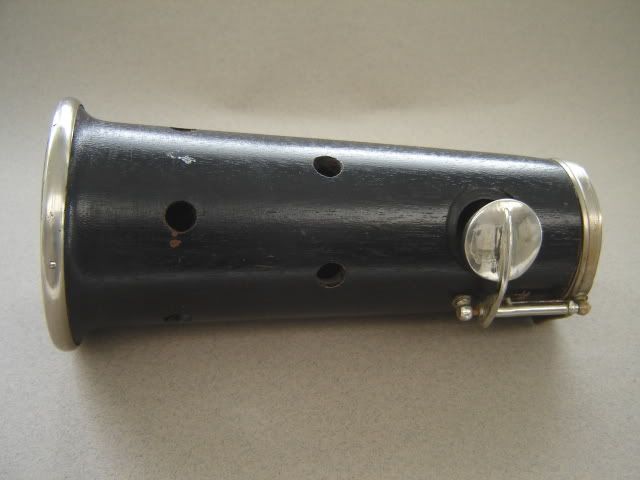
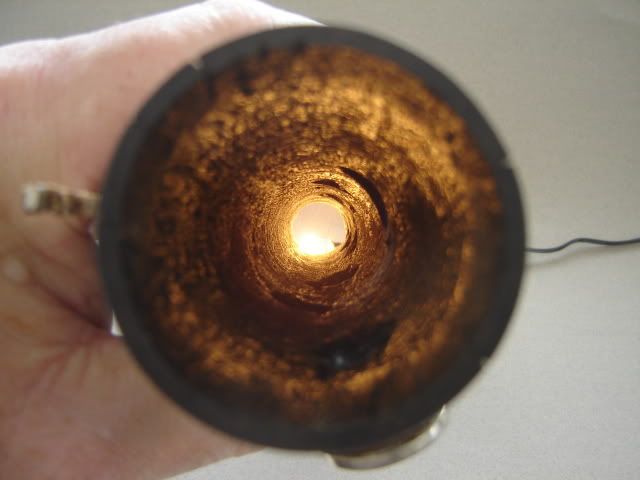
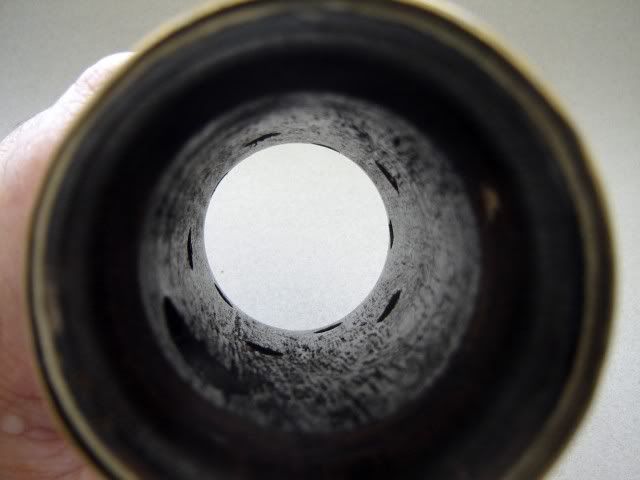
The first four photos below show the upper and lower joints and the condition of the toneholes. Fortunately they appear to be in better condition on the lower joint with larger toneholes.
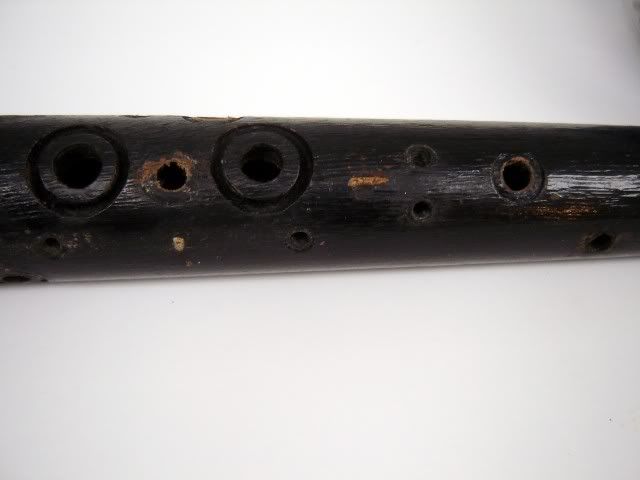
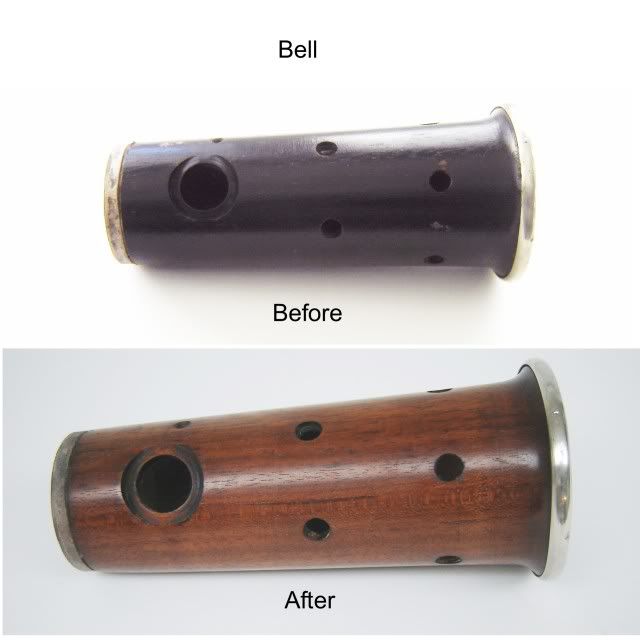
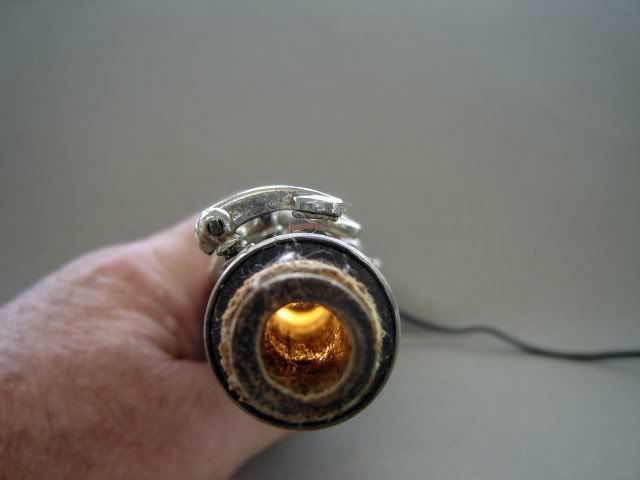
The next three photos show the irregularity inside of the bore of the upper and lower joint and inside the bell. Benade calls these types of irregular surfaces "perturbations".
The next photo shows the keys, pads, and rods that were removed. Rather than find fault with the workmanship that went into the construction of this instrument, I am amazed at what they could accomplish with the tools and materials they had to work with.
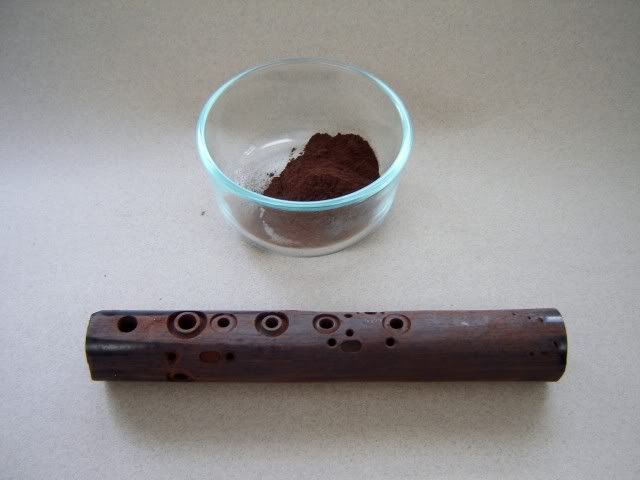
An old Martin Freres clarinet gave it's life to provide grenadilla dust for the restoration of the toneholes on this taragoto for which I am grateful.
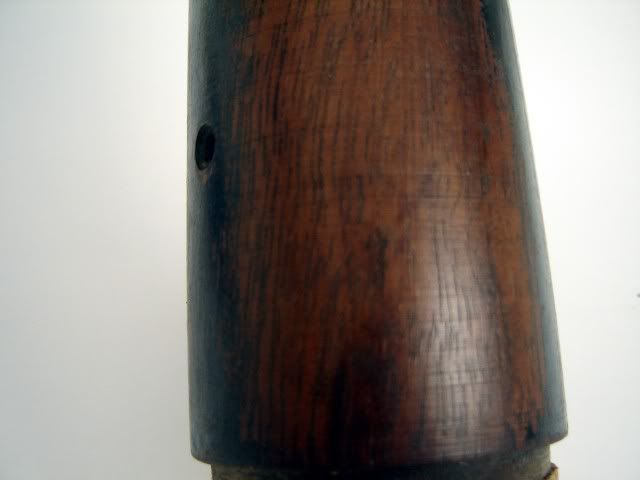
The shining light at the end of this long tunnel is the discovery of a beautiful instrument inside this "ugly duckling". This last photo shows the results of some rubbing alcohol on a rag and some elbow grease on the lower joint.
Since I can only work on this project between customer instruments and the restorations I sell on eBay, the next installment may take me a while to post.
Part 2 will entail the repair and restoration of the body of the instrument inside and out, with emphasis on perfecting the tonehole surfaces.
Part 3 will undertake repairing and modernizing the keys, posts, rods, and springs.
Part 4 will be the repadding, adjusting, and fixing the intonation wherever possible.
I welcome all comments, suggestions, and advice anyone might have. I'll do my best to answer questions, but remember this is a work in progress and I am plowing a lot of new ground here as I go along.
I am calling this thread Taragoto "remanufactured" instead of Tarogoto restored for reasons that will become obvious as one views the pictures.
Part 1 of the challenge has been to carefully clean and disassemble the instrument, access the condition of its parts, and to devise a plan of action.
The first few photos show the original condition of the tarogoto at the time I received it from Toby (kymarto). " . . .to call it crude is an understatement" were his exact words when he posted about it. I know now he was being overly kind and generous in his remarks.
The next group of photos show the tarogoto disassembled, and the parts that were removed. The unthreaded rods holding the keys were easily punched out using a small nail set and a pair of pliers. It was mostly rust holding them in place anyways.
The posts came out quite easily as well. They are screwed into place and the shrinkage of the wood as it dried in Utah's climate made them easy to turn. The Music Medic small post pliers was the ideal tool to unscrew them.
It is interesting to note that few of the keys are actually "keycups" as we know them. They are simply dish shaped circles that the pad sits on, rather than in. On some keys there are needle springs beneath the key made to act as flat springs do on modern woodwinds.
The pads are handmade, thin, and made of various materials---none of which are familiar to me. They were glued to the key "dishes" with a glue that released when heated, thank goodness.
The first four photos below show the upper and lower joints and the condition of the toneholes. Fortunately they appear to be in better condition on the lower joint with larger toneholes.
The next three photos show the irregularity inside of the bore of the upper and lower joint and inside the bell. Benade calls these types of irregular surfaces "perturbations".
The next photo shows the keys, pads, and rods that were removed. Rather than find fault with the workmanship that went into the construction of this instrument, I am amazed at what they could accomplish with the tools and materials they had to work with.
An old Martin Freres clarinet gave it's life to provide grenadilla dust for the restoration of the toneholes on this taragoto for which I am grateful.
The shining light at the end of this long tunnel is the discovery of a beautiful instrument inside this "ugly duckling". This last photo shows the results of some rubbing alcohol on a rag and some elbow grease on the lower joint.
Since I can only work on this project between customer instruments and the restorations I sell on eBay, the next installment may take me a while to post.
Part 2 will entail the repair and restoration of the body of the instrument inside and out, with emphasis on perfecting the tonehole surfaces.
Part 3 will undertake repairing and modernizing the keys, posts, rods, and springs.
Part 4 will be the repadding, adjusting, and fixing the intonation wherever possible.
I welcome all comments, suggestions, and advice anyone might have. I'll do my best to answer questions, but remember this is a work in progress and I am plowing a lot of new ground here as I go along.