Untitled Document
     
Advertisement Click to advertise with us!
     

Tech Tips

jbtsax

Distinguished Member
I thought it would be a good idea to start a thread where both professional and amateur repair techs could share some of the easy to use tricks and techniques that they have found work for them.

A couple of mine to begin with:

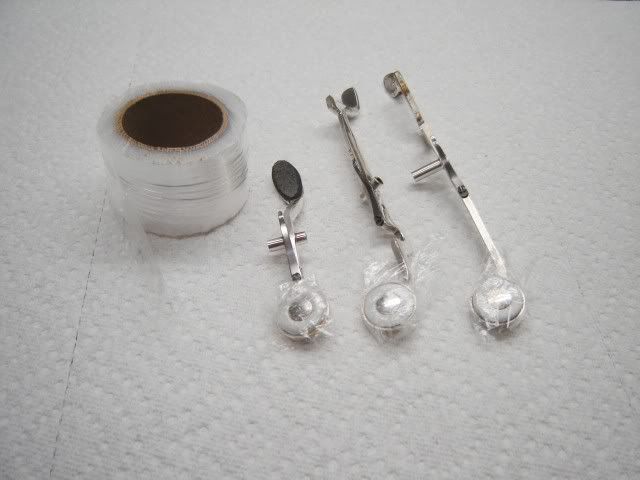
1) Wrap the threads of your sax neck adjusting screw (going the opposite direction you tighten) with plumber's teflon tape. It makes a big difference in the feel and effectiveness of the screw. Important: the neck fit should be snug even when the screw is loose. If it is not take it to a competent tech to have the tenon refit.

(2) If your adjustable sax thumb rest will no longer stay in place even when the screw is tightened all the way, remove the thumb rest and use contact cement to glue a sheet of 400 grit sandpaper (face down) on the bottom. When set, trim with a razor blade or exacto knife and reinstall. The added friction will keep it in place where you want it.

John
 
I've been told -- and I've tried -- using clear nail polish on the heads of screws keeps 'em tightened.
 
Rather than putting a dab of grease on the feet of the palm key flat springs to reduce friction, take the key off and quickly heat the end of the spring with a lighter and touch the heated spring with paraffin wax. BE CAREFUL not to heat the spring so much it turns color or it will lose its temper.

John
 
Also for flat springs it can sometimes help to smooth/round the sides where the spring is touching the body and sometimes the end too. Sometimes the sharp edge can create more friction and eventually grind a bit into its seat. Don't know if it's easy, I use my micromotor with several different abrasive bits at about 30k RPM.
 
Neck corks and tenon corks can be made to work better and last longer with this technique.

-First clean the cork thoroughly with warm water, a tooth brush, and pledge detergent. Next hold a piece of paraffin wax over a flame until it begins to melt and quickly apply to the surface of the cork covering the surface liberally.

-Next take a pad slick, or a butter knife and heat in the flame to the count of 10. Quickly "iron" the wax into the cork with the hot blade. Reheat as necessary.

-Once the wax has cooled, coat liberally with cork grease and put the joints together or the mouthpiece onto the cork and twist several times. Remove and wipe away excess wax and cork grease.

-After being "waxed" the cork will rarely, if ever, need cork grease. It will last longer and give a good solid fit when the parts are put together.

John
 
I has always been a challenge for me to replace flat springs on sax and clarinet keys. I always end up fumbling with the small screws due to my rather large fingers. I finally found a method that works for me that is fast and easy. I first insert the small screw head in a pin vise with the appropriate size collet. Then I use that to hold the screw while starting it into the thread.

Techtipspinvise.jpg


Techtipsstartingsmallscrew.jpg
 
Here is another tip for working with white "Roo pads". It is a challenge to keep them clean while installing keys onto the instrument. I cut the end off a roll of Saran Wrap about 1 1/4" wide and use that as a protective tape to wrap around the key cups until the key is on the instrument.

TechtipsSaranWraptape.jpg


If the white pads do happen to get soiled, I have found that the dirt type stains come clean with a white eraser, while the grease or oil type stains can be cleaned using Tolulene on a Q-tip.

CleaningWhiteRooPadswhiteerasers.jpg


Closeupoferasercleanedpad-1.jpg


CleaningWhiteRooPadsTolulene-1.jpg
 
Also for flat springs it can sometimes help to smooth/round the sides where the spring is touching the body and sometimes the end too. Sometimes the sharp edge can create more friction and eventually grind a bit into its seat. Don't know if it's easy, I use my micromotor with several different abrasive bits at about 30k RPM.

Agreed concerning the corners/edges. For best non-friction results, the wearing surface of the steel should be as highly polished as any burnishing tool.
 
Back
Top Bottom