So, I bought a 3D printer

pete

Brassica Oleracea
Staff member
Administrator
A Sovol SV06. It's a very well reviewed printer that has a lot of community support, although the paid support is supposed to be poor. It's also a recommended printer for 3D printer newbies, like me.

It took me about an afternoon to assemble the printer, calibrate it, and print Benchy. It came out great. No problems at all after I got the firmware update from Sovol's website. A couple successful prints later and some higher-grade PLA filament (that's the stuff the printer uses to print), I went on to print an alto sax mouthpiece. The one I settled on was this one. The instructions and build files are here.

The print came out a bit better than advertised and all I had to do is gently sand the tip of the mouthpiece to round off the pointed corners. I didn't bother with any of the other sanding instructions. I borrowed my wife's alto and gave it a toot: I could play the entire keyed range. Mind you, this is a horn that needs a full overhaul and I haven't played any horn for any length of time for at least 5 years. Also, while the reed was in original, sealed, packaging, it was probably 3 years old. So, I'll call this a successful test.

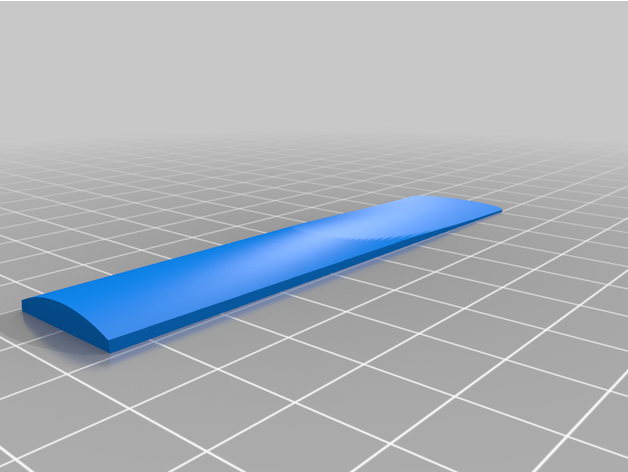
I then pushed my luck and 3D printed a reed. The reed came out about twice as thick as a standard Vandoren 2.5. I was barely able to put it on the mouthpiece with the stock Selmer ligature I was using. I tried blowing through it and there was no vibration at all. So, research must continue.

Note that I used PLA filament in all my tests. The reed is supposed to be printed with PETG and the mouthpiece is supposed to be printed with PLA+.

I see that there are a bunch of other mouthpieces, reeds, end caps, mouthpiece caps, and ligatures you can print.
 
Just curious, besides the cost of the printer, what did it cost to make the mouthpiece? Always wondered about that.
TL;Dr
I've printed some stuff both before and after the mouthpiece. The spool of filament is about 1/2 used. Full roll is $25. So, under $10 would be a good guess.

===============

There are several different types of 3D printers. The common ones are the type I have, which uses filament, and the kind that uses resin. The main differences:

* Filament printers are an order of magnitude simpler to use than resin.
* Resin printers produce finer details than filament, all things being equal. In other words, a beginner-level resin printer can print better details than a beginner-level filament printer.
* Resin printers use more chemicals that can kill or injure you if you don't use them properly.
* Resin printers are faster than filament printers, all things being equal.
* You've got to buy more stuff to properly print something with a resin printer. If you look at that Amazon link I have, above, it's a 3-piece bundle. It doesn't even come with resin. That makes it about $150 more than my printer. That also doesn't include the protective equipment you should buy: eye wear, chemical-resistant gloves, etc.
* If space is a premium, as it is in my appx 11' x 11' office, TV room, and computer keyboard repair facility, a resin printer and associated stuff will take up more room.

I should note that a computer doesn't have to be directly connected to most of the printers out there. The one I have allows you to copy stuff onto a micro SDHC card from your computer and pop it into a port on the printer.

While I don't mind being on the bleeding edge of technology, the run-down of all the stuff I'd need for a resin printer, and the research I've done told me that a filament printer was a better deal for me.
 
I did a fair amount of testing of 3D printed reeds on Contrabass clarinet. I could use them if I had to, but none of them were quite ”there”.

 
I'd like to be able to 3D print some better reeds, because, using Mojo's example, contrabass clarinet reeds are extremely expensive.

I'd also like to be able to get much cheaper good mouthpieces. Again using Mojo's example, a bottom-line contra mouthpiece at WWBW.com is $120. 3D printing one is less than $30. I've also borrowed a bass sax for a weekend-ish gig before and the mouthpiece was smashed. WWBW.com starts at $265.00. (Luckily, my bari sax mouthpiece was bigger and played somewhat in tune. Yes, I can remember this despite it being over 30 years ago.)

I should learn how to use CAD or buy a 3D scanner. Well, when I have an extra $700 or so lying around :D.
 
In general, you can not print a mouthpiece that has a good facing on it. They can be good blanks but hand finishing is needed.

Material costs are very low with 3D printed items. Labor costs are high if you value your time.
 
> In general, you can not print a mouthpiece that has a good facing on it. They can be good blanks but hand finishing is needed.
I bow to your mouthpiece expertise on this. My testing consisted of a person that hasn't played in any professional capacity in years (me) who was able to get sounds out of a horn that's missing a part and needs an overhaul.

What I'm thinking of doing, once I get more experience with the 3D printer stuff, is to print a few mouthpieces and send them to a person that is, in fact, a professional player.

> Material costs are very low with 3D printed items. Labor costs are high if you value your time.
Yes-ish. What I've been doing is find an item I want to print, then start printing while working on something else. As I don't completely trust this thing not to burn down my house, I do want to keep the prints down to hours that I'm home. In each of the three or four software packages I've tried, the print time is listed.

If I was doing this professionally, I'd have a farm of several dozen printers going at once. I'd hope that I'd have more of a clue about what I was doing if I was a pro. There are also really, really fast pro 3D printers out there that significantly reduce the printing time, but also significantly up the cost.

From the hobby aspect, there are approximately 1.34 billion settings I can tweak (I counted), which makes life interesting. There's the time sink.
 
The settings adjustments needed to dial in the process is one area where the time can add up. Once the settings are good, I would not count the print time as significant. As you say, you can do other things.
 
I printed a pen/pencil/pencil-sized tool holder, a small storage box that I'm using for oversize pens, an ornamental box for holding TV remotes (too small, so I'm not using it) and a bookend.

Things I've learned:
* Pay attention to the first layer of print. If it looks screwed up, your entire print will be screwed up.
* If there's a minor flaw, it's probably going to be printed over, so don't worry about it.
* I don't know a more technical way of describing it, but check to make sure the printer is printing out one "stream" of material. If it's not, use the "Change Filament" setting and purge the filament a few times. IDK if this means "change nozzle soon" or something, but this has worked for me.
* Use the software to rotate the thing you're trying to print so the biggest/flattest "side" is facing down. Takes just a couple clicks.

I also decided to get new printer software from Prusa and, after digging a lot, I found some really good set-up instructions to use that software with my printer that I was actually able to read. Why I say "actually able" is because there's a ton of 3D printer terminology that I don't know.

Gandalfe, the cost of that mouthpiece looks like it was probably less than $1, now.
 
On my printer (JG Maker Artist D), I stopped purging material on PLA color changes. I usually start each print with a skirt or brim (Cura slicer terms). Part way through printing the skirt the color changes to the new one. I just saves me a minute not having to purge.

I do use my printer’s filament change feature to heat and back out the first color during a swap. I then just load the next color cold and start the next print.
 
So, I finally printed enough stuff that I needed a new roll of filament. That's a good thing, but after about 6 prints, the printer stopped working properly.

The first troubleshooting step is re-leveling the bed. I did this about 15 bazillion times (I counted). No help. The next step was to buy a filament dryer. I live in a desert. We get single-digit humidity most of the summer. I'm also running an air conditioner, so I doubt my room has big time humidity. However, considering that was the next troubleshooting step, I went out and bought one. It has a sensor to show the humidity of the roll of filament. Original measurement: 21%. After running for 6 hours: 17%. That was a little underwhelming.

I then went off troubleshooting I could find online and decided to replace the print nozzle (where the plastic comes out), as I have an extra one. Caked goo everywhere on the nozzle and parts around the nozzle. One of the fan parts was broken, too. I first went to the Sovol website to check for part prices. Plastic part isn't available, but the metal one is. I then Googled. You can only get the plastic part as a 3D print file or possibly if you buy a $70 kit. Yay.

So, I'm trying to get my printer to work well enough so I can print that part. It's not a guarantee that the part will fix everything, but it's something to try.
 
That all sounds familiar. Trouble shooting is a big part of running a 3D printer process. Needed for both equipment issues and settings issues. You can usually Google for things to try.

Using a filament dryer never helped me much. Now that I have one I do use it now and then. They usually do not have a fan so I doubt they are very good at drying by just warming up the filament. But I do sometimes see condensation inside the dryer.

I just the dryer to dry out gel packs and throw them in my filament storage tub. That may help.
 
Using a filament dryer never helped me much. Now that I have one I do use it now and then. They usually do not have a fan so I doubt they are very good at drying by just warming up the filament. But I do sometimes see condensation inside the dryer.
I bought one that does. Since I might use something other than PLA filament in the future, I wanted something that would go beyond PLA's recommended 50C drying temp. Mine goes to 60C or 70C. I also have a couple holes (from the manufacturer!) in various places in the dryer, so I don't have to keep moving the spool of filament from the dryer to the printer and back again.

I can say that my prints look a bit smoother when I use the dryer.

My gentle ministrations on the printer obviously did work. I also made a couple of adjustments to the heat (3D printers sometimes need to get very hot to do stuff). I've successfully printed four or so large projects, with one taking about 4 hours to do. I'm still not convinced this thing won't burn down my house, so any print that takes longer than 9 hours is currently not on my "to do" list.

It also amuses me to note that I used the profits from my keyboard repair hobby to buy the dryer for my 3D printing hobby.

Oh. That plastic part? It doesn't print very well. It'll be fine after the application of 50 grit sandpaper.
 
There is one guru who recommends mounting a fire extinguisher ball over your 3D printer. It is not common practice. I have not done it. If I heard a horror story I might be inclined.
 
I decided to look into fire suppression more and I just purchased a Wham Bam “the Cloud” for ~$33 shipped. I already use a tent-like exhaust hood. This product will mount to the inside top of it with Velcro.
 
I like the video, Mojo, and encourage others to watch it!

I'll think about getting that. I'm not quite sure that I can mount it in the same way as in the video/pics on the website is because my filament spool is on the other side or in the way. Testing will continue!
 
I watched another video on how to test your printer for what it will do in a thermal runaway situation. Most, if not all, have safeguards (now) In the controls.

I did not test my printer and have been using it for 2+ years. For the $ and product size, it made sense to me to have it for a last line of defense.

There are a lot of red sphere shaped fire suppression products that you can hang over your printer.
 
This is an interesting application to make woodwind mouthpieces. Over on Cox Engine Forums, someone made a PLA engine back for a Cox .020 model airplane engine, patterned after the last of the Cox .049 horseshoe backs for engines of the late 1990's for use with a separate fuel tank. It worked for a charm and for a time, he was doing a limited production run for those who wanted them.

The back has the venturi and a needle assembly of brass that provides the respiration end of the engine, mixing air with fuel. On the front side is the reed valve assembly of a mylar reed, for intake valving on these 2 cycle engines.

If it is capable of providing carburetion for a miniature model plane engine, the then these wonderful machines ought to do a decent job of mouthpiece production, too.
 
Back
Top Bottom