Greenback Valentino pads experiences

I'm about 1/2 way through repadding my taragot. Upper joint is done.

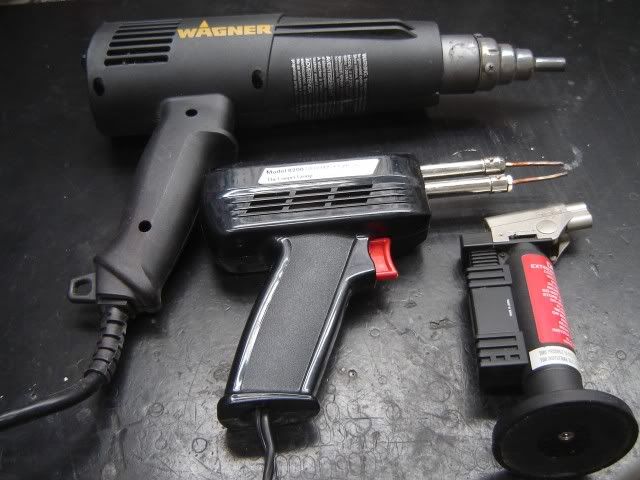
Perhaps I have less-than-ideal set up, but I find that with the Valentino pads, I basically have 1 shot at it - if I want to reheat the cup and shift the pad, I risk deforming the foam by the generated heat. By less than ideal, I mean I have my heat gun set up in my vise pointing up, set on lower setting, and I heat the cup above it. I have not invested in a torch, which I assume is what's normally used.

But the pads seem to form a nice seal pretty quickly (tested by opening the key and seeing the entire imprint of the tonehole). I followed John's advice of floating the cups. This is a bit harder on some keys, as I only have about 10 seconds to get the key into position.

I'm really glad I decided to re-pad the entire instrument. Some of the old pads I just lifted with my fingers with 0 effort. I have no idea how they stayed on this long. I'm surprised I didn't have any embarassing moments on stage.

George
 
Last edited:
I'm glad the Valentino pads are working for you. In the photo below showing the heat sources I use for pad work, the one in the center is what I use for clarinet (tárogató) keys. It is a "poor man's version" of the Votaw pad cup heater that uses electric current.

If you don't have a Weller soldering gun, it is easy to find one in pawn shops for around $10 - $15. You simply cut the tip off to expose the two metal prongs and file them smooth and clean on the ends. It heats the key cup quickly without exposing the pad to excessive heat. The only thing to remember is to release the trigger before pulling the tip away from the key cup or the electricity will "arc" leaving a mark on the key.

Heatsourcesforshellac.jpg
 
Sweet, that clears things up! I like the super-focused heat gun the most, that's probably what I'll get. Looks like Walmart carries it...

On one of the pads the green backing peeled off when I was readjusting it (I didn't want to heat the cup excessively), so I used contact cement to glue fabric backing to the pad, then used George's Glue to glue the whole thing back to the cup. But that experience told me I need a more refined way of heating the cups.

George

I'm glad the Valentino pads are working for you. In the photo below showing the heat sources I use for pad work, the one in the center is what I use for clarinet (tárogató) keys. It is a "poor man's version" of the Votaw pad cup heater that uses electric current.

If you don't have a Weller soldering gun, it is easy to find one in pawn shops for around $10 - $15. You simply cut the tip off to expose the two metal prongs and file them smooth and clean on the ends. It heats the key cup quickly without exposing the pad to excessive heat. The only thing to remember is to release the trigger before pulling the tip away from the key cup or the electricity will "arc" leaving a mark on the key.
 
I didn't cut the end off my weller tip yet. I'll have to try that. On small clarinet cups it heats them up well enough as is. On big sax cups, I found that I can touch the two leads to the cup, making contact before the tip. Probably easier to remove the tip.

I also have a battery powered weller solder gun which works pretty well for small cups. I don't think it will have enough heat for big sax cups, but it might work in an emergency.

I have solder guns, but I was concerned about screwing up the plating.
 
I have solder guns, but I was concerned about screwing up the plating.

I haven't had any marks on the plating at all in repadding a sax, a clarinet and doing repairs on a couple other clarinets. The direct heat is probably easier on the finish than flame, which is an oxidizer. I think the only problem is when the tip is clipped, at that point arcing can be a problem. With a standard tip, there is no issue, just takes longer to heat than a clipped tip. Also, I would worry about a heat gun affecting the finish of the wood/plastic(when doing an adjustment on the horn). Where as a solder gun will only heat the key it touches. *Shrug*, I am new to this also, just giving my own experiences and oppinions.
 
I haven't had any marks on the plating at all in repadding a sax, a clarinet and doing repairs on a couple other clarinets. The direct heat is probably easier on the finish than flame, which is an oxidizer. I think the only problem is when the tip is clipped, at that point arcing can be a problem. With a standard tip, there is no issue, just takes longer to heat than a clipped tip. Also, I would worry about a heat gun affecting the finish of the wood/plastic(when doing an adjustment on the horn). Where as a solder gun will only heat the key it touches. *Shrug*, I am new to this also, just giving my own experiences and oppinions.

Oh I don't go anywhere near the instrument with a heat gun, I always take the key off first.
 
Oh I don't go anywhere near the instrument with a heat gun, I always take the key off first.

Makes it alot easier to level the pads when the keys are on the instrument. Must be kinda tough to get them leveled by taking off the key for the adjustment. Whatever works for you though.
 
Makes it alot easier to level the pads when the keys are on the instrument. Must be kinda tough to get them leveled by taking off the key for the adjustment. Whatever works for you though.

Well apparently that's where I was missing the boat:)

On the plus side, I still have 1/2 the instrument to go, so I'll give the soldering gun a shot.

George
 
Got a soldering gun

I picked one of the "Chicago" chinese soldering guns at Harbor Freight for about 12 bucks. It claims to go to 1100 F in 12 seconds. It comes with 3 replaceable tips, but I'll try to use it without cutting the tip off first.

I have a love/hate relationship with Harbor Freight. I love the fact that I can find just about everything there that I would not find in Home Depot (our hardware store chain), but I hate the fact that I'm buying cheap chinese imports. Hard to justify paying 3x more in other places though, when in the end, all those products are chinese.

George
 
I had a fear of using the electric current at first, but it soon went away when I discovered how fast, safe, and effective it is to heat unlacquered keycups. You could practice heating a quarter held with needle nose pliers at first to get a feel for how fast the metal heats up. A traditional soldering iron or gun simply does not transfer the heat as quickly and effectively and is not as safe to use since it stays hot much longer on the bench.
 
I had a fear of using the electric current at first, but it soon went away when I discovered how fast, safe, and effective it is to heat unlacquered keycups. You could practice heating a quarter held with needle nose pliers at first to get a feel for how fast the metal heats up. A traditional soldering iron or gun simply does not transfer the heat as quickly and effectively and is not as safe to use since it stays hot much longer on the bench.

I've been missing out! The soldering gun approach makes so much more sense than flame or anything else. I finished the lower joint yesterday. It was almost impossible NOT to get a perfect seal using the floating method. The only tricky part was that one section where 2 holes are closed by 2 pads operated by the same key, and there is some cork cushioning involved between 2 metal parts. But I got that sealing well also.

Probably discovering the obvious here...
That sounds great. I am happy you are finding success. The tricky part you describe is called "regulation". This is what woodwind repair is really all about.

The formula for good regulation is: tight keywork + perfectly seated pads + quiet/non compressible material between linkages = regulation that lasts

Originally the material in that linkage was cork, used elsewhere as well. About 0.5mm in this case. Clearly compressible. I'll see what else I have around the shop.

I learn something new every day...
 
Actually .5mm of traditional cork is not too bad. That has been used for many years in the assembly of woodwinds. Newer materials that are available are Tech Cork , Synthetic Felt, and one I haven't tried yet that is reported to be very quiet Q-Felt.

There may be other materials that other techs on this forum can suggest. I recently read a suggestion from Nitai to use synthetic leather when a very thin and quiet linkage material is required. Not having synthetic leather, I instead cut a strip from an unused white Roo pad and it was perfect for that particular application.

I guess I shouldn't disclose that I used wine cork to make a few key stoppers then :)
 
I guess I shouldn't disclose that I used wine cork to make a few key stoppers then :)
I've actually used wine cork in a number of repairs. Basically, there are two types of wine cork (I won't count the plastic replacements):

- "blockboard", made from a few thick sheets, laminated together
- "particle board", made from glued-together shreds

The former type can be used very well for stoppers and linkages as it behaves much like traditional sheet cork.

The latter type is like "tech cork" with all its advantages and disadvantages, it is rather difficult to sand down, but I found a specimen that works exceptionally well for register and water key corks.

I also use wine cork for cabinet door dampers, in lieu of rubber feet for kitchen machines etc. It's too precious to throw away.

My hardware store sells something that looks like tech cork - very fine cork particles glued together. They sell it in sheets about 5mm thick. I was meaning to look into that as well.

Do people use pad glue for linkages and stoppers? I pretty much dislike working with contact cement now - takes too long and can be messy (not to mention the fumes). I glued most of my stoppers with George's pad glue yesterday, I don't see why not.

George
 
A traditional soldering iron or gun simply does not transfer the heat as quickly and effectively and is not as safe to use since it stays hot much longer on the bench.

I see what you mean now. Wow, what a difference cutting off the tip made.
 
Do people use pad glue for linkages and stoppers? I pretty much dislike working with contact cement now - takes too long and can be messy (not to mention the fumes). I glued most of my stoppers with George's pad glue yesterday, I don't see why not.
Normally, I'd just take the key off, heat it in the appropriate location, rub with a glue stick over that hot part until a film of glue has transferred there, apply the cork/felt, press together five seconds (until the pain in the finger which touched the hot metal has eased off), et voilà. When everything's cold, I trim the excess glue and cork with a razor blade.
(For the "pressing" part, I since wear the cut-off finger of an old leather glove)
 
Back
Top Bottom